Monday, October 14, 2013

Week 16: 2013 CSA Season Comes to a Close

Fall is here.

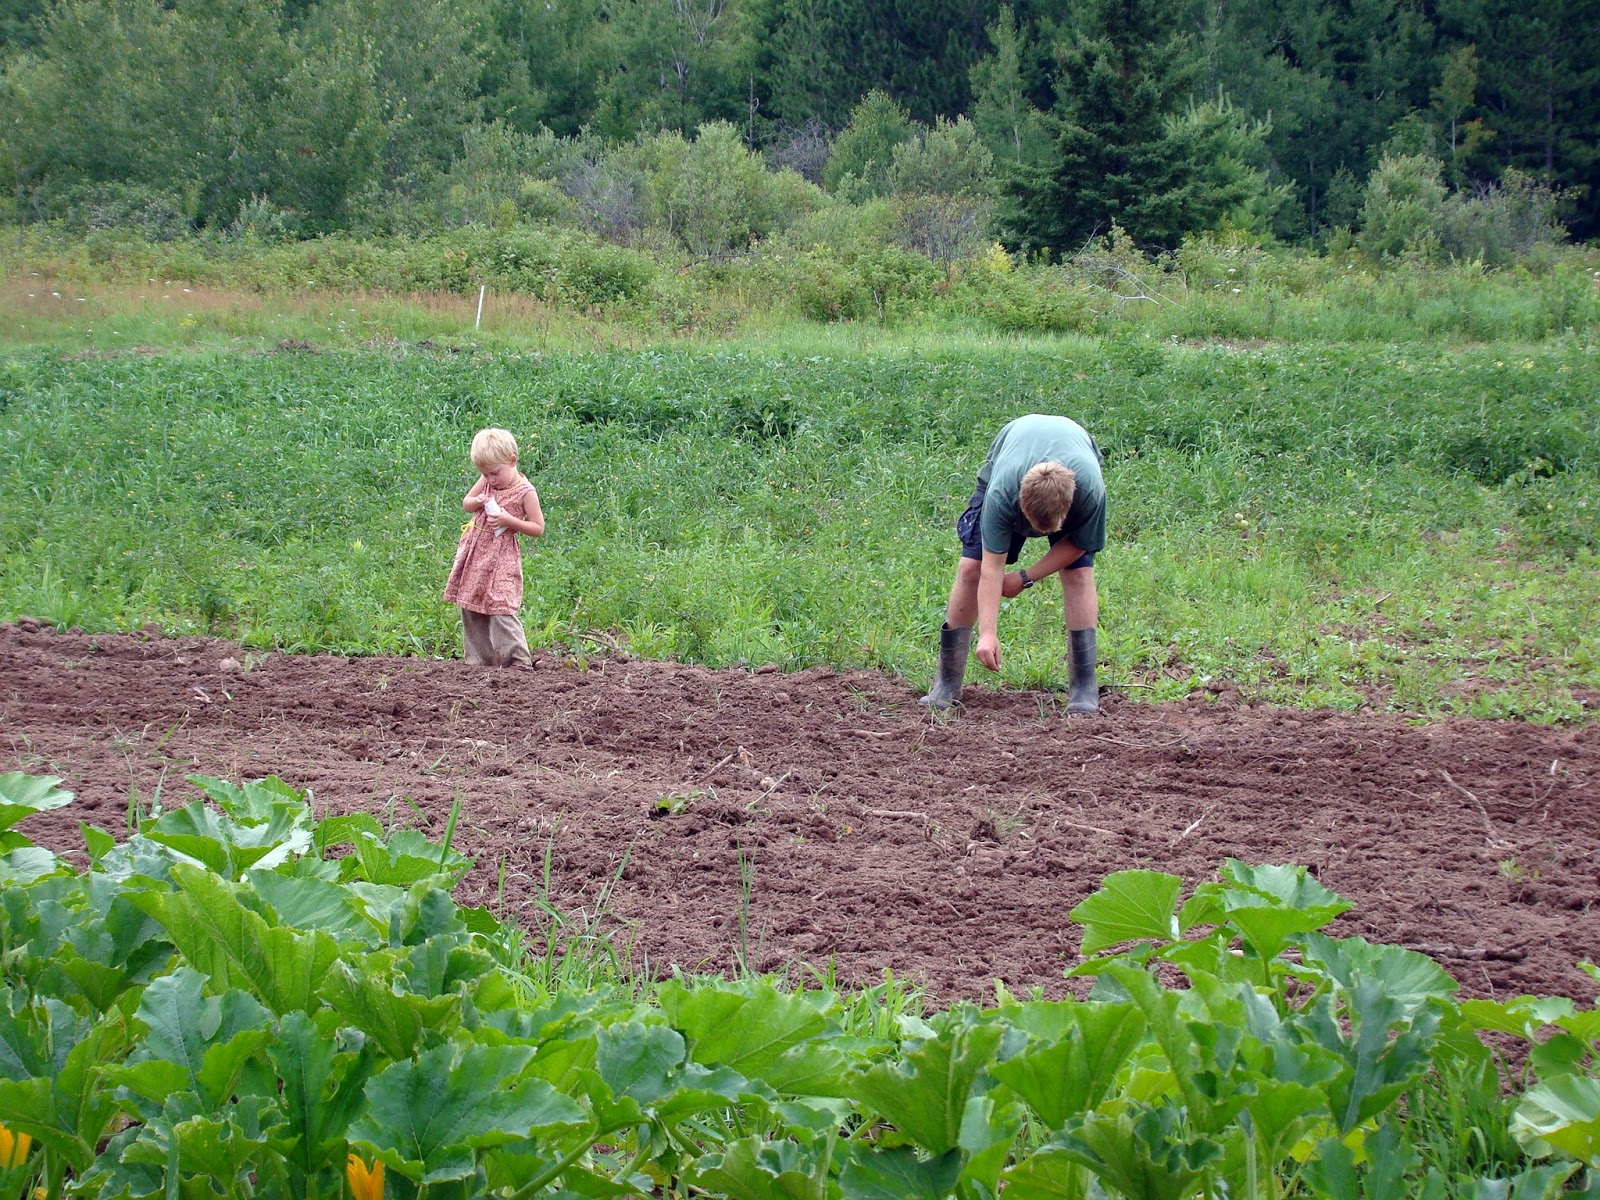
Note Scott's hunter orange cap. A sure sign of fall.
It's finally official because we had our first real frost last night. Just in time for the final fall harvest of the 2013 CSA season! The weather actually lined up with our activities for once this year :)

This final harvest is turning out to be a bit of a whirlwind for us. We've shifted the pick-up so that we will be able to attend a family wedding this Friday (thank you once again for letting us make this change!!), which means we need to have shares ready for all seventy five members this Wednesday, rather than spreading the harvest between Wednesday and Saturday pick-ups as we usually would. So, we've attempted to spread the harvest between three days.

We did take time out yesterday to catch this seventeen and a half inch brown trout though:

This was totally all Scott. I had nothing to do with catching this fish.
I was downstream, most likely disentangling my line from something.

Today we got started on the root vegetables.

We got through carrots (you each get three pounds this week)
And about half of the beets (you get one pound this week)

The beets gave us some trouble this year. Remember way back in the spring when it was very wet? That happened just after we planted the beets, in an ever so slightly low area of the garden. Long story short, we have smaller than normal beets this year. So a pound of beets is actually several beets, but they are little. We had hoped to have 2 or 3 pounds for everyone. Enough to make it worth breaking out the canner. If you are determined to have pickled beets, this is the recipe we use: http://www.pickyourown.org/pickledbeets.htm. At least you won't have to chop them up!

In addition to carrots and beets, everyone can expect to receive: Tomatoes, Scallions, Onion, Celeriac, Gold Ball Turnips or Winter Radishes, Daikon, Brussels Sprouts, Winter Squash, Rutabaga or Cabbage, Kale or Chard, Fall Salad Mix, and Parsley or Sorrel or Basil.

If you don't know or have forgotten, be sure to roast your Brussels Sprouts. Drizzle them with a little olive oil and chopped garlic (and balsamic vinegar if you are fancy) before roasting them in a single layer at 400 degrees until they are just starting to brown. Roasting makes Brussels Sprouts delicious. Boiling them does not.

You should also try mashing your root vegetables.

Root Vegetable Puree

A simple and delicious fall side dish. If you remove all of the greens and keep the veggies in your crisper (or another cold, high humidity environment), all of the items that go into this dish will easily keep until Thanksgiving, though this recipe only makes enough to serve four. Throw in some potatoes (boil them with the other veggies) or roasted squash if you want to bulk it up. Also, drink a bit of the cooking liquid. It's tasty. Seda tasted some from my glass and said "Mama, did you make a special vegetable tea?" before requesting a glass of her own.

  • One large or two small Rutabaga, peeled and chopped roughly
  • Two large Carrots, peeled and chopped roughly
  • Three very small (or one large) Celeriac, peeled and chopped roughly
  • Salt
  • Butter (about a tablespoon)
  • A handful of Celeriac leaves, if you still have them, chopped
Bring a large pot of lightly salted water to a boil. Add the vegetables (but not the celeriac leaves) and boil until they are all tender enough to easily pierce with a fork. Do not over boil or you will have a mushy, watery, mess. It shouldn't take more than 20 minutes.

Remove the vegetables from the cooking water. Reserve the water for another use (special vegetable tea...soup stock). You will want a small amount of the cooking liquid for the next step.

Puree the vegetables with your favorite pureeing device (by now you all know how much I enjoy my immersion blender), adding a bit of the cooking liquid if needed to make a smooth puree.

While it is still hot, stir in butter and a handful of chopped celeriac leaves.

Before you stir, it will look like this. Assuming it is dark out and your
kitchen is not well lit.

Monday, October 7, 2013

Week 15: Happy Birthday to Me!

It's my birthday.

Seriously, right now. Earlier we celebrated by swimming at the AmericInn and hiking the Summit Peak Loop. The color in the Porkies is perfect today, by the way.

Actually, this photo shows the cakes I made for Seda's birthday
party a few weeks ago. But you get the idea.

As I type Scott and Seda are preparing a birthday "cake" for me. It's an apple-carrot-green tomato crisp. You'll find the recipe at the bottom of this post.

And now you know three items to expect in the share this week. If you recall, the last two shares of the season are extra big. This is the first of those shares. You can expect: Apples, Green Tomatoes, Carrots, Daikon Radishes, Tomatoes (ripe ones), Beets, Onions, Rutabaga or Kohlrabi, Winter Squash, Celeriac, a choice of Herbs, Gold Ball Turnips or Winter Radishes, and Kale or Chard or Dandelion Greens.

The only new thing this week is daikon, which I will get back to in a second. The celeriac may be a challenge for some of you - perhaps you still have some lurking from last week. If you need some ideas for using it, you are in luck. I just went crazy pinning celeriac recipes on pinterest, you can find those if you click here. You could also add some celeriac to the fall soup recipe below.

The daikon is another storable radish (like the winter radishes - incidentally, if you want to store any of your root veggies be sure to remove the greens first and store the roots in the crisper or some other cold, humid place) and can be used similarly. The daikons are nice, because they are full of flavor - like the other winter radishes - but have a crisp juicy texture, more like that of the french breakfast radishes. If you need some more specific ideas, I pinned a few recipes here

Now, I have two recipes for you, just to make sure you can use everything in your shares.

The first is a thick soup. Scott invented it the other day. It is a lovely combination of savory and sweet, and filling with with a hunk of whole grain bread.

The second is my birthday crisp. I invented this recipe, mostly because I still really want to come up with a tasty dessert that features green tomatoes, and Scott made it. I would say that it's pretty tasty, but maybe a bit too sweet for my taste. I understand that he had a four year old helper, and they may not have followed the recipe exactly...Still, next time I would probably only use a quarter of a cup of sugar in the filling. Proceed according to your tastes.

Fall Soup
  • 2 small or 1 large orange fleshed winter squash, halved and baked (Scott left the seeds in and it turned out great - he has a thing for squash seeds. You can take them out if you don't share his thing.)
  • 6 large carrots, chopped
  • One bunch (6-10) gold ball turnips, chopped
  • 1 medium beet, chopped
  • 1 medium onion, chopped
  • 4 cups apple cider (or enough to cover the above ingredients)
  • Salt, Cinnamon, and Nutmeg to taste
  • 2 Tablespoons Butter
Combine all of the ingredients, through the cider, in a large pot. Cover and bring to a boil. Turn the temperature to simmer and simmer until the vegetables are tender.

Once tender, puree the soup. We use an immersion blender (you should get one if you don't have one) but you could also use a regular blender or a food processor.

After pureeing, reheat the soup if necessary, and season to taste. Add butter to finish the soup.


Birthday Crisp

Scott made my birthday crisp in his cast iron pan.
Because he loves his pan as much as he loves me.

For the filling:
  • 2 large or 4 medium carrots, sliced in 1/4 inch slices
  • 1/4 cup water or apple cider
  • 1/2 cup sugar
  • 1/2 tsp cinnamon
  • 1/2 tsp nutmeg (or much less than that if you are using freshly ground)
  • 2-3 apples, sliced thickly
  • 2-3 green tomatoes, sliced thickly
For the topping:
  • 1/2 cup butter, melted
  • 1/3 cup sugar
  • 1/2 cup rolled oats
  • 1/3 cup whole wheat flour
  • 1/2 teaspoon cinnamon
Preheat the oven to 400 degrees.

Place the carrots, water or cider, sugar, and spices in a large saucepan (or cast iron skillet if you are awesome like me husband). Bring to a boil, turn down the heat and simmer for about five minutes. Then add the apples and green tomatoes. Continue to simmer until the apples are just tender.

Meanwhile, combine the ingredients for the topping.

When the filling is ready, transfer it to a pie plate (or leave it in your kick ass skillet) and sprinkle the topping evenly over it.

Bake until the topping is golden, approximately 15 minutes.

Sing happy birthday to me :)

Monday, September 30, 2013

Week 14: Thank you!

The true meaning of member support has really come through this week. Thank you everyone who has agreed to shift the final Saturday pick-up to Wednesday so that we can attend a family wedding on October 18th.

You guys rock!

Just to remind everyone, this change really only impacts the Lake Linden and L'Anse members and it won't happen until mid-October. I will spend this week individually contacting (by email) everyone effected by the change to make sure that you all know about it and have a plan to get your veggies and I will definitely be sure to to remind you closer to the time. As you should all know by know, I can be really persistent when it comes to reminding people:

ONE WEEK LEFT!!! click here to contribute

Also, thanks for the kind words about our decision to attend the wedding. It is more or less impossible to travel (or take any kind of time off) during CSA season, but we knew that when we signed on for this gig.

In fact, much of my extended family and my entire immediate family is at a picnic right now, but I'm here doing this. 

So, if you don't mind, I'll be brief.

This week's share will include: Carrots or Beets, Kohrabi or Rutabaga, Turnips or Winter Radishes, Celeriac, Potatoes, Leeks, Brussels Sprout tops, and Tomatoes +

Brussels sprout tops are the leaves on the tops of the plants, which should be removed so that the plants will put their energies into growing bigger sprouts. You can use them as you would kale.

Celeriac is also called celery root. Last year was the first year we grew it for the CSA and we had pretty bad germination, so this year we started about 2000 seeds. And had good germination, but they didn't size up very well. So it kind of worked out and you can expect a bunch of little celeriac in your share this week. The tops can be used like extra flavorful celery (it is perfect for soup) and the roots are like the perfect cross between celery and rutabaga. Roast them with your other root veggies (carrots or beets and radishes or turnips) if you want a bit of yummy. 

The leeks are also on the small side.

The larger leek in this photo is one of the biggest I saw out there.

I could pretend it is because they are babies, but truthfully, this is the first year that we have grown leeks and we are still figuring out how to make them do their best for us. There is always more to learn on a vegetable farm. That is one of the main reasons that I love it here!

Small or big, they will still go wonderfully with these potatoes:

Scott rigged up a potato digger and he couldn't be prouder :)

In the name of brevity, I am not offering an original recipe for vichyssoise this evening, but instead simply sharing a link for  a simple potato leek soup recipe that I think you will all enjoy. If you don't already have plans for your celeriac, add some or all of them in with the potatoes in this recipe for an extra layer of sumptuous flavor in your soup.

Monday, September 23, 2013

Falling

It's fall. You know how I can tell?


The squash are on the dance floor.

They're not dancing, they're curing. They need to sit for a bit after harvest to allow their skins to harden and their starches to break down into sugars so they'll be sweet and sturdy when we put them in the shares weeks 15 and 16. Our new location, Wintergreen Foods, is the perfect place to spread them out.

This week, which is week 13 if you are keeping track, the shares will include: Watermelon, Tomatoes, Onions, Green Tomatoes, Parsley or Sorrel, Chard or Dandelion, Winter Radishes or Gold Ball Turnips, Carrots or Beets, and fresh Herbs.

Ah, watermelon, that favorite fall treat ;)

Watermelons are tough to ripen in the U.P. Especially this year (remember June and July, when it was almost as cold as it is right now?). We ended up planting them in the hoophouse this year, or we wouldn't have gotten any. We weren't able to fit all of the plants we started in there though, so our dream of two weeks of watermelon has not yet been realized. Perhaps next year.

Some may be wondering what we're up to with the green tomatoes. Hopefully returning members already have plans for them (fried green tomatoes are even better than the movie). If not, here is a link to past posts which include my fried green tomato and green tomato relish recipes plus a few more ideas.

If anyone has a good green tomato pie recipe PLEASE let me know. I want so much for green tomato pie to be delicious, but all the recipes for it that I have tried are...not.

Gold ball turnips, which are an optional item this week, are just starting to be ready for harvest. They are honestly my favorite thing that comes out of the garden. They aren't like the hakurei, gold balls are small but all turnip, but they are sweeter than your average turnip. I suggest cutting them into quarters and sauteing them in butter until they are just soft. Then, chop the greens and add them to the pan just until they turn bright green. Mmmmm...

If you don't get turnips this week (don't worry, they'll be around for at least another week or two) you will get winter radishes. We are growing four winter radishes: Misato Rose, Green Meat, Black Spanish, and Shinden Risoh. You won't see any Shinden Risoh this week. They are a traditional daikon and, now that we thinned a few out last week, we plan to give them the chance to put on as much size as possible before we distribute them in the final two weeks of the season.

You will see Green Meat, which is a miniature daikon with green flesh, and a few Black Spanish, which are really really spicy but not quite up to size yet, and many Misato Rose. The Misato Rose are hard to describe, because they aren't all the same. Fedco, where we bought them, indicated that they would vary in color on the outside, but all would have spicy pink flesh.

But that has not been the case.
We have seen several pink fleshed misato rose, but the lighter skinned radishes we have seen (upper right in this photo - with black spanish to the left and green meat below) have been white/green fleshed and relatively mild. Still yummy though.

I am having a ton of fun with the winter radishes, because I always get excited the first time we grow something, but Scott thinks my excitement over these particular new items is a little ridiculous. 

Radishes make me sick. I really like them. I just feel like I'm going to puke whenever I eat them.

I braved it though, and came up with a simple radish recipe for those that are not sickened by them. Or those that are, but like them anyway :)

Radish Slaw

I kept this extremely simple, but it could be punched up any number of ways. Grated carrots, ginger, celery seed, parsley, or onions all come to mind as good additions. I'm sure you could come up with plenty more delicious ideas as well. The radishes stay pleasantly spicy in this recipe, but the sweet and sour flavors balance the heat.
  • Three small Winter Radishes (as in the photo above, the misato rose is about 1.5 inches across for reference), thinly sliced and chopped into small pieces, or grated
  • Two small Apples, sliced as for the radishes (you want to end up with more or less equal quantities of radishes and apples)
  • One Tablespoon Honey
  • One Tablespoon Apple Cider Vinegar
  • A pinch Salt
Combine all of the ingredients and allow them to sit, refrigerated, for at least one hour. Eat it up. Preferably with something grilled.

A spoonful of this over grilled chicken sounds perfect.
Get it while the weather holds.


Monday, September 9, 2013

Week 11: Planning Ahead

You really have to plan ahead on a vegetable farm.

If you want winter radishes you have to plant them in the
 first week of august.

So we did. And now we have a bumper crop of shinden risoh, misato rose, and green meat radishes coming along. We also have a rather bolty crop of black spanish radishes.

At the same time we planted the winter radishes, we put in some french breakfast radishes (which you may remember from last week's share), some hakurei, and some gold ball turnips. 

I love gold ball turnips. SO MUCH. Click here if you, like me, enjoy reading about how wonderful the world's greatest turnips are as you anticipate how awesome it will be to eat them. Because it will be awesome to eat the turnips, though it isn't quite time to do that yet. 

It is time to thin the turnips (another one of those planning ahead things that you need to do on a vegetable farm), which means that this week we get to eat the awesome turnip greens.


Along with turnip greens, this week's share will include: Onions, Carrots or Beets, Radishes or Hakurei, Cucumbers, Rutabaga, Chard or Kale, Basil, Parsley or Sorrel, and Tomatoes etc.

What should you do with your awesome turnip greens? Cook them with an awesome steak, of course. If you are not a meat eater, you can do almost exactly the same thing, just skip the part in the recipe where you put the steak in the pan. The greens will still be good, just not nearly as meaty.

Meaty Greens

The steak I cooked for this recipe was from Kolpack Family Farm. They are just down the road from us and have wonderful meat. I honestly cannot recomend them enough. Also, I threw some sliced radishes in with my greens. I know that I was talking to someone about cooked radishes (they weren't a raw radish fan) the other day. Cooking radishes really mellows their flavor. This is how you do it :)
  • One small Onion, sliced thinly
  • 1/2 Tbs Olive Oil
  • 1 bunch Turnip Greens, roughly chopped
  • 1 Sirloin Steak, approximately a pound of meat
  • Salt and pepper to taste
  • Optional: Half a bunch of radishes, sliced in 1/4-1/2 inch pieces
Heat the olive oil over medium heat in a large frying pan. Add the onion, and a pinch of salt and pepper. Cook, stirring frequently, until the onion is just beginning to soften. 

Add the steak to the pan, salt and pepper each side to taste. Brown on both sides. 

Turn the heat to low and continue to cook until the meat has reached your desired degree of doneness, flipping every five minutes or so. The cooking time will vary based on how thick your steak is and how you like your meat. Mine took about a total of ten minutes per side after browning.

Once the meat is done to your liking, remove it from the pan. Keep it warm.

Turn the heat up to medium/low. If you are including radishes, add them to the pan and saute them for about two minutes before adding the chopped turnip greens. Stir the greens in with the pan juices from the steak. Cook, stirring frequently, until all the greens have wilted and turned a more vibrant green color. 

Pile the greens onto the serving platter with the steak.

Once the sun sets, my food pictures tend to get kind of ugly. Sorry about that.
I promise it tastes good.


Monday, September 2, 2013

Week 10: Full of Beans

Well. Maybe not full of beans. But we do finally have enough to give everyone some.

The burgundy beans (our second bush bean planting) is still going reasonably strong, and the dragon's tongue (the third planting) should have a sizable harvest for the Saturday shares, but the favas are the real story this week.

Whatever magic weather these things need to set pods
finally happened this year, and the plants all look like this.

So, this week members will receive: Favas or Bush Beans, Carrots or Beets, Radishes, Cucumbers, Onions, Broccoli or Kohlrabi or Rutabaga, Lettuce or Endive, Basil, Parsley or Sorrel, and Tomatoes/Eggplant/Peppers.

I know that many people who receive fava beans will shove them in the fridge with intentions to figure out something to do with them, and then pull them back out in a week (or two), decide they are too old to eat, and compost them.

To avoid that as much as possible, I have made a board with as many good fava bean ideas as I could find. Click here for everything from grilled favas in the pod, to fava bean crostini. Also, it seems that many old world eaters do remove the pod, but don't peel the beans. Read about that here.

Now that the favas are covered, I would like to turn to the not actually green beans. The burgundy beans and the dragon's tongue will both lose their color when cooked. They're still appealing, the burgundies turn green and the dragons go yellow, they're just not as much fun. Because I always try to promote fun, I encourage those of you who receive them this week to eat them raw. 

This salad is a good way to do that.

Bean and Radish Pasta Salad
  • Pasta to serve 4 (something fun, like bowties or rotini)
  • A generous handful of bush beans, tops removed, beans chopped into bite size pieces
  • One bunch of radishes, sliced thinly, greens chopped
  • Your favorite basic vinaigrette - or use the recipe below

Prepare the pasta according to the package directions. When the pasta is done, do not rinse with cold water. Toss it with the vinaigrette and radish greens so that the greens wilt a bit and become more tender. Then toss in the beans and sliced radishes. Can be served warm or cold.

Mustard Vinaigrette

  •  1/4 cup olive oil
  • 2 Tablespoons red wine vinegar
  • 1 teaspoon Dijon mustard
  • 1/2 teaspoon dried thyme
  • salt and pepper to taste
Whisk together the above ingredients until well combined.


Monday, August 26, 2013

Week 9: All About Edible Flowers

I don't particularly like working in the garden when it is this hot and humid.

Fortunately, many of the hard working plants disagree with me.

These peppers like it hot.
So do these tomatoes.
I wonder what next week will bring...

This week's share will include: Cucumbers, Zucchini or Summer Squash, Kohlrabi or Broccoli or Mini Cabbage, Onions, Potatoes, Basil, Tomatoes etc, Endive or Radicchio, and a choice of Herbs or Edible Flowers.


I think a few members are wondering about the edible flowers. They're fun to try, but what should you actually do with them?

They're definitely more of a garnish than a meal, but there is a wide variety of ways to cook with flowers, and some are surprisingly tasty. 

For instance, a few months ago, we sprinkled salt, pepper, sliced scallions, and calendula petals on some pork chops before we grilled them.

And I swear the calendula made it taste like we'd grilled them with
fresh pineapple slices.
Notice that I said petals. Flowers vary quite a bit in taste, from resinous calendula to spicy dianthus and mild borage, but most of the sepals (aka "green bits") taste the same - icky.

So pull the petals off and leave the sepals behind.

Eat this.
Not that.
If you would like more ideas, check here: edible flower recipes.

Or you can try the following very simple recipe:

Flower "Jello"

These quantities make a very stiff "finger jello" type dessert. For a softer consistancy, use as little as half an ounce of gelatin.
  • 4 cups apple juice, separated. Or use half juice and half water.
  • 1 ounce dry powdered gelatin 
  • Edible flowers from one share (about fifty blossoms), sepals removed and composted
In a large bowl, sprinkle gelatin over 1 cup of the apple juice, allow to sit for at least one minute. Bring the remaining three cups of juice to a boil.

Pour the boiling juice over the juice and gelatin. Stir until the gelatin is completely dissolved. Transfer the juice and gelatin to a mold or shallow pan if desired.

Refrigerate for about a half an hour. If you add the flower petals to the boiling hot mixture they will cook and their color will fade.

After the mixture has cooled to about room temperature, stir in the flower petals.

Get your kids to help :)
The petals will float on the surface of the juice.

Go with it, it works.
Refrigerate for an additional two hours, or until the gelatin is firm. 

Unmold, or slice into squares, or just eat it with a spoon - like we did.


Monday, August 19, 2013

Week 8: Don't You have Hoop Houses?

Yes, we do have hoop houses. Two in fact.

And, as Seda likes to say - they're jungles inside.
Last year, when it was unusually hot, they were churning out jalapenos by the first week of July.

This year, when it is unusually cold, they provided us with just enough tomatoes, eggplants, and tomatilloes to split up among 75 shares last week and give each member a small taste of summer.

This kind of year is the reason we have hoop houses. We plant all the warm weather stuff in the field too, but even the shortest season varieties won't yield if the weather doesn't cooperate. When a tomato seed packet says 65 days, that means 65 *degree days* after transplanting. It doesn't include the time the seedlings were growing in the greenhouse, and it doesn't include days when the high temperature refuses to creep past 55 degrees.

Thankfully, we have had a stretch of proper degree days lately. The heat will not only speed up ripening in the hoop houses, it means we'll probably get a nice harvest out of the field before the first frost as well.

Until then, the shares will continue with just a taste of eggplant, peppers, tomatoes, tomatillos, or ground cherries. This week the tastes will be accompanied by: Cucumbers, Summer Squash/Zucchini, Lettuce, Basil, freshly dug Potatoes, Onion, Kohlrabi or Mini-Cabbage, and a choice of Herbs or Edible Flowers.

So, what can you do with just a taste of tomatoes (etc.)?

Well, this week makes me think of ratatouille, that classic combination of zucchini, tomato, eggplant, and basil. I realize that the ratios are a bit off and there are only a few eggplant to go around. But a zucchini, tomato, and basil tart would certainly keep to the spirit of the idea. Start with this recipe and tweak as needed.

If you come home from pick-up with tomatillos, you will need to go in a different direction. My usual recommendation is to use them in guacamole. I stand by that. It's good. Try this recipe if you want to.

The lovely and delicious tomatillo.
But tomatillos have a really complex flavor and they are surprisingly versatile. This week I decided to play around with them, and came up with this salad/quick pickle recipe, which is even easier to make than guacamole.

Cucumber and Tomatillo Salad

You could also make this with tomatoes, but then you will have to come up with a different name.
  • 1 small onion, sliced thinly and rings separated
  • 2 medium cucumbers, sliced thinly
  • 6 - 8 small tomatillos (about 6 ounces), husked and diced small
  • 1/2 teaspoon salt
  • 1 tablespoon balsamic vinegar
  • Freshly ground pepper to taste
Toss together all of the ingredients. Refrigerate for at least a half an hour. The cucumbers will release a lot of liquid while they rest. Toss again before serving.

The balsamic really brings out the fruity, tart flavors of the tomatillo. Yum.


Monday, August 12, 2013

Week 7: Burgundy Beans and Frogs

I like being a CSA farmer.

Frogs abound in my puddles. This photo shows four, if you're counting.

And, on any given day (during the growing season),
my daughter can sit and munch on fresh vegetables
to her heart's content.

Today it was burgundy beans (AKA purple podded
green beans)
This week some members will have the opportunity to munch burgundy beans too! 

We're still transitioning between peas and beans (I'm starting to think we might not actually switch all the way over to beans this year, we're supposed to have another 45 degree night tonight) so there will be a choice between snow peas, favas, and a mix of green and burgundy beans.

Along with beans or peas, members can expect: Beets, Head Lettuce, Cucumbers, Basil, Kale or Chard, Zucchini/Summer Squash or Radishes, and Sorrel or Parsley.

Before I forget, the purple beans turn green when you cook them. Eat them raw if you want full color impact.

I kind of struggled to come up with a recipe this week. If you haven't heard, we just purchased some new property on Thursday. Read about it here if you're curious. We also had friends and family in town and just general life happened.

While I have been able to keep up with a lot of things, I haven't been cooking as much as I usually do. So, the recipe this week is more of a method. I barely cooked at all and I ended up with a delicious lunch for two. It could also be the base of a more substantial meal.

Fried Basil over Noodles

I used Thai basil and rice noodles in this version. If you want to use Italian basil use olive oil instead of peanut oil, add freshly grated Parmesan cheese instead of soy sauce and rice vinegar for a salty/pungent kick, and serve it over pasta. Add any lightly cooked vegetables you want (green beans, zucchini, cauliflower...raw tomatoes...you could even use lettuce and cucumbers and make a salad) to either version. This technique can be used to fry any herb. Sage fried in butter served over egg noodles is a classic. Whatever combination of herb and oil you use, the result will be slightly crisp flavorful herbs and fragrant oil.

  • 3 Tablespoons Peanut Oil
  • About 4 ounces dried rice noodles (or enough to serve two)
  • A handful of basil leaves (I used about half a share's worth of basil), chopped roughly
  • Soy Sauce and Rice Vinegar to taste
Heat the oil in a small, high sided pan over medium/high heat. You want the oil to get very hot without reaching its smoke point, so watch it carefully.

While the oil is heating, prepare the noodles according to the package directions.

When the oil is hot, toss the chopped basil into the pan (be careful, it will definitely splatter - this is why I said to use a high sided pan) and immediately remove the pan from the heat. Stir to make sure that all of the basil is cooked.

When the noodles are drained, chop them into bite sized pieces and toss them with the basil and oil. Drizzle on soy sauce and rice vinegar to taste.


Saturday, August 10, 2013

Nope, We're Not Opening a Restaurant

We are converting this restaurant


into a produce processing facility.

We plan to offer various products, such as bagged salad mixes, frozen squash puree, dried greens, and zucchini chips, for sale to local institutions (like school cafeterias), restaurants, and grocery stores. Items will be made entirely with Upper Peninsula grown produce, some grown by us and some by other area farmers.

Playing with our new Dehydrator.
It's going to be a few months before we really have
products for sale, but drying greens is fun :) 
We'll use the existing walk in cooler to store winter vegetables such as potatoes, beets, carrots, rutabaga, celeriac and anything else we (and other area farmers) decide to grow and, as soon as practical, we plan to build more cold storage in this section of the restaurant:


I imagine there are still some head scratchers out there, people wondering just what, exactly, we are up to. The best term for the business we are undertaking here is regional food hub. That term is quite general, just as any given store will look different from the next, there isn't one specific definition of a food hub. If you would like to learn more about the concept, this USDA publication should shed some light: USDA Regional Food Hub Resource Guide.

So, I hope that answers at least some of the questions that are floating around right now. Stay tuned for more details as we get things underway!

Monday, August 5, 2013

Week 6: Good Stuff

It has been a good week.


Scott and Seda found a snake during Friday harvest.
We made some serious headway on our fall planting.
We just came inside from planting several different types of fall radishes,
gold ball turnips (my favorite!), and more. We also have about 2000
fall starts - from spinach to cauliflower - in the greenhouse.
We finally set a closing date for this place (THIS THURSDAY!!!) which
we are going to turn into a produce processing facility called
Wintergreen Foods. I promise much more on that subject soon.
And the summer crops are starting to come on strong enough
 to make their way into the shares.

This week members can expect: Cucumbers, Head Lettuce, Kale or Chard, Beet Greens (from the thinning of our summer beet planting - there might be some baby beets attached, feel free to cook them all together - click here for some recipe ideas), Spring Onions, Cauliflower or Zucchini, Peas or other Beans, and an Herb/Flower Choice.

This year's transition out of greens season is still a little tricky. The peas are starting to slow down as the favas and green beans are picking up. That's the normal progression of things, but this year it's much more drawn out than we usually see, which is why this week's share has peas or other beans. Most members will probably end up getting snow peas on Wednesday, but we really can't say what the end of the week might bring...

If you end up getting favas and find them a little perplexing, please have a look at this post from 2011, which was a bumper fava year for us.

When I have a particularly good week, it's also usually a particularly busy week, so this week's recipe is for a simple frittata. 

Whatever You Want Frittata

Frittatas are fast, flexible, and ridiculously easy. You can put any number of veggies in them, so they are a great way to use your share. The frittata in the photo has about three and a half cups of  chopped "weeds" that I pulled out of the field (mostly lamb's quarters, with a bit of purslane and amaranth thrown in as well) and a small zucchini. I also seasoned it with curry powder, but you could use a few cloves of garlic if that's more your thing. Just cook the garlic for a couple minutes in the olive oil before you add the vegetables to the pan.

  • Approximately 2 Tablespoons Olive Oil
  • 3 - 4 cups chopped vegetables. Items in this week's share that would work well include cauliflower/zucchini, the peas or beans, and any of the greens.
  • Salt and Other Seasonings (Maybe just black pepper or garlic, cumin, curry, jalapeno...) to taste
  • 8 Eggs

Preheat your oven's broiler.

Heat the olive oil in a 12-inch oven proof skillet over medium heat. Add whatever vegetables and seasonings you are using and saute them until they are cooked to your liking. This may mean adding items at different times. For my weeds and zucchini frittata I wanted the zucchini to cook a little longer than the greens so I added them about a minute before the greens.

Crack the eggs and whip them lightly. You want the yolks and whites just combined.

When the vegetables are cooked to your liking, stir them into the eggs. Add a bit more olive oil to the pan if it looks like it needs it, then pour the egg and vegetable mixture back into the pan. Allow the eggs to cook, not stirring them, until they are almost entirely set. Lift the sides up as the eggs cook to let some of the raw egg flow into the bottom of the pan and cook.

When the frittata is mostly set, with a thin layer of uncooked egg on the surface (this should be after about 8 to 10 minutes of cooking), place it under the broiler until it is completely set and the surface is slightly golden, 2 - 3 minutes.

Run a knife or fork between the pan and frittata, to help it release, then invert the frittata onto a plate and cut it into wedges for serving.

My in-oven-photo skills are somewhat lacking, but I just couldn't
resist this opportunity to share a shot of my dirty oven with the world.

Monday, July 29, 2013

Week 5: Something Else

Remember the week two post? I said the weather was getting "normal"? Apparently I jinxed things because since then we have seen a spike of 91 degrees (the recorded high on the 18th of July) and a low of 41, which was recorded sometime this very morning.

Of course, today turned out to be beautiful. I am not going to mention what tomorrow might bring for fear of throwing things out of whack.

I will say that the extreme swings have been a challenge for the garden. The heat slowed down the cold weather crops (like the favas, which are recovering - slowly) then the cold came in and stalled the warm weather lovers.

As a result, the first round of very promising fava flowers came and went with no beans to follow, and the cucumber plants have been covered with these for almost a week and a half now:

Cute, but not ready to pick. 

So, the week 5 share will not include favas or cucumbers.

It will include: Frisee Endive, Kale, Snow Peas, Basil, Gilfeather Turnips (which are actually a rutabaga), Scallions, Parsley or Sorrel, Fresh herbs or Edible Flowers, and Something Else.

The share or two during the transition season - as we shift between the spring greens and the summer fruiting vegetables - are always the hardest to balance, but this year has reached a whole new level. So, we have "Something Else" in the shares this week. We have a little bit of a few warmer season things (beets, carrots, cauliflower, zucchini, etc) but not enough of any one of them to put in all of the shares, so one of the items will be a surprise this week.

Surprise!
Or, maybe, Surprise!
The gilfeather turnips, which are in fact especially delicious rutabaga, are making their first appearance at Wintergreen Farm this year. They are a Slow Food Ark of Taste variety and, now that I have tasted them, I think they are worth the acclaim. We've actually been eating, and enjoying, them raw right in the field. They are also fantastic cooked. If you need some rutabaga recipe ideas, click here. The greens are like tender kale, the roots will store best if you cut them off, but we'll leave them on for you. Please eat them!!

I would wager that you'd all like another endive recipe idea (or two). Try pasta salad, if you haven't yet. Cut up a head of endive and toss it into your favorite pasta salad recipe. It's seriously good.

So is this.
Frisee with Cherries and Feta

We were all raised on flavorless lettuce, so I know it can be really hard to figure out how to eat assertive salad greens. The key is to pair them with other assertive flavors, as in this salad recipe.
  • 1 head frisee endive
  • 3 tablespoons olive oil
  • 1 tablespoon balsamic vinegar
  • salt, pepper, and herbs to taste
  • about 8 ounces fresh cherries
  • about 2 ounces crumbled feta
Chop the endive into bite sized pieces, if you aren't sure how to go about that, click here. Though don't leave quite as much core behind as the woman in the video does, the white bits at the bottom are the sweetest part.

Whisk together the olive oil and balsamic vinegar, add salt and pepper to taste. You can leave the dressing at that or add a teaspoon or so of herbs. I used tarragon. Thyme would be good.

Pour the dressing over the endive, and toss to coat. Cover and place the endive in the refrigerator. At this point you are going to allow the dressed endive to rest for 15 minutes or so. The rest mellows the bitterness and evens out the flavor of the salad.

While the endive rests, pit and halve the cherries. Toss the cherries and the crumbled feta with the frisee just before serving.


Monday, July 22, 2013

Week 4: Snow Peas and Green Lace (wings)

It's snow pea season!

The snow peas are coming on strong. Everyone can expect a
generous quantity of them this week and, if the weather
cooperates, the next two or three weeks to come.

It's also green lacewing season.

These are green lacewing eggs, next to our front doorknob. I have no idea why
a mama green lacewing would decide to lay eggs here, but I think it's awesome.

Normally green lacewings lay their eggs on plants, especially those likely to become infested with aphids, because aphids are what their nymphs - which are sometimes referred to as aphid lions - like to eat. There are green lacewing eggs all over the place this year. I saw a gazillion of them on the snow peas during harvest. I only saw one aphid though. Last year was a really bad aphid year, and this year we are seeing somewhat fewer than average. In the insect balance of the vegetable farm universe, lots of aphids last year means a big year for green lacewings this year, though many of the nymphs that hatch from these eggs won't make it to maturity for lack of prey. Especially the ones on my front door. Next year the green lacewing population will likely be back to normal. 

Just thought I'd mention them. Now you'll know what they are if you happen to get some green lacewing eggs along with your share this season.

In addition to green lacewing eggs and snow peas, members can expect to receive: Braising Mix, Endive, Kale, Basil, Scallions, and Parsley or Sorrel.

Some of you may have noticed the article about grain salads that I linked to on the facebook page the other day. It encourages a lot of improvising in the kitchen, which I know not everyone is comfortable with. So, I came up with a grain salad that uses share items and stuff I had on hand in my kitchen. If bulgar isn't something that you tend to have on hand, you should. It's handy.

Bulgar Salad with Snow Peas and More

As with the example in the article I mentioned above, this recipe is meant to be experimented with. You can follow it exactly or change it as much as your comfort level allows. Consider soaking the bulgar well ahead of time. We keep a jar of soaked bulgar in the fridge (when we remember to) for spur of the moment salads. This quantity would make a light lunch for two or a side dish for four. Feel free to multiply it.
  • 1 cup soaked bulgar (a generous 1/2 cup dried bulgar, soaked for at least an hour)
  • 2 oz (a large handful) snow peas, stems removed and chopped.
  • 1 or 2 scallions, sliced
  • 1 kale leaf, sliced into narrow ribbons
  • 2 or 3 sprigs of parsley, minced
  • 1/4 cup peanuts, I used raw but roasted would work too, chopped roughly
  • 1 small apple, chopped and sliced into bite sized pieces
  • 2 Tablespoons olive oil
  • 2 teaspoons apple cider vinegar 
  • salt and pepper to taste
Stir together the bulgar and chopped vegetables, apple, and nuts. 

Use a fork to whisk the oil and vinegar together, add salt and pepper to taste. Stir the dressing onto the salad until everything is well coated with dressing. Eat immediately or refrigerate for up to 24 hours to allow the flavors to meld.


Monday, July 15, 2013

Week 3: The Greens are Still Coming

It's still pretty much greens season at Wintergreen Farm. And this week we have a new one for the members.

Frisee Endive

Frisee is a frilly, slightly bitter salad green. It is used in many traditional french salads, especially Frisee aux Lardons, a simple salad with frisee, bacon, and poached egg. This week we are going to include it in a salad mix with spicy red giant mustard and colorful merlot lettuce. If you would like some more ideas for salads with frisee, click here.

Along with salad mix, members will receive Braising Mix, Beets or Hakurei, Kohlrabi, Head Lettuce, Spring Onions, Herbs or Edible Flowers, and Basil. The basil, which will be a choice of Thai basil or sweet basil, will be in the form of basil tops. This time of year we pinch off the large top leaves of our basil plants...

Like these leaves on this Thai basil plant
With the top leaves plucked, the side leaves
will grow better, which means bushier plants and
more basil for you later this season.

The Thai basil is a little further along than the sweet basil at this point, which means some of you might get Thai when you were hoping for sweet. If you end up coming home with a handful of Thai basil tops, I suggest adding them to a stir fry, slicing them and sprinkling them on a kohlrabi salad, or trying this sesame noodle recipe I posted at basil top time last year.

We are also making a slight change to the braising mix this week. Along with the dandelion and various Asian mustard greens you have been receiving, this week you'll see baby rainbow chard, which should pretty up the mix nicely. 

See the chard? It's the pretty one to the left of the frisee.

This week's recipe features the braising mix. Usually I go for lightly cooked greens recipes, but this one calls for an hour of simmering. It is based (very loosely) on a traditional Kashmiri recipe called Haak from Madhur Jaffrey's World-of-the-East Vegetarian Cooking. Haak is normally made with collard greens. It is also usually made with mustard oil, which is hard to find in the US because the FDA thinks it is unhealthy, and lots of fresh and dried chilies, which I skip because my three year old is a lightweight when it comes to spicy stuff. 

I did use the traditional asafetida, which I picked up at World Foods in Houghton some time ago. My guess is most of you don't happen to have a jar of that on hand. If not, still make the dish. There really isn't a substitute, asafetida is dried resin from the root of a plant in the carrot family. It is very stinky. The best way I can describe it is that it stinks of food. I suggest a few cloves of garlic in place of it. It won't taste the same, but the garlic will fill the hole that the missing asafetida creates. 

Also, this is meant to be served over rice. Somehow, I was out of rice. Bulgar worked nicely.

Sort of like Haak
  • 1/4 cup peanut oil
  • 1/8 teaspoon asafetida (or garlic)
  • 2 spring onions, white and green portions, sliced
  • 1/2 - 3/4 lbs cooking greens (for reference, you receive 3/4 lbs braising mix in your shares) chopped into bite sized pieces.
  • 1/2 salt, or more to taste
  • 1 cup water
Heat the oil over medium heat in a 4 cup saucepan with a lid. Stir in the asafetida or garlic and let it cook for about five seconds. 

Add the greens and onions, cover the pot and let the greens cook to wilt for about a minute. Open and stir the greens to mix them with the oil. Add salt and water, there should be just enough water to cover the greens. Bring the water to a boil, cover, and simmer for a half an hour. 

Check the greens at this point, if there is a lot of liquid left in the pan remove the lid and continue simmering for approximately half an hour more, or until the greens are tender. If there is a small amount of liquid (around a half cup) continue simmering with the lid on. Serve over rice, or bulgar if you forgot to buy rice.