Showing posts with label chard. Show all posts

Monday, July 28, 2014

Greens and Honey

Last week was greens and bacon. This week is greens and honey. Sometimes the secret to delicious greens lies in the pairing.

Chard Greens with Honey and Balsamic, courtesy of
Chef Arlene Coco Buscombe
This week's share will include the following: Snow Peas, Lettuce, Spring Onions, Braising Mix, Chard, Parsley, Fresh Herbs, A Kohlrabi/Hakurei/Broccoli choice, and a tiny taste of Tomatoes OR Eggplant OR Peppers from the hoophouse.

We are starting to edge away from the all greens shares, with snow peas and the first harvest from the hoophouse.

I'm sure everyone is familiar with snow peas. But in case someone out there isn't, they are great cooked quickly in stir fries, raw in salads, or nibbled as delicious snacks.

The hoophouse portion of the share will be small this week, think a half a pound of tomatoes or one large eggplant or a couple of sweet peppers. Literally a taste of things to come...


This week's recipe was inspired by an event held this evening at the Algomah Acres Honey House.


If you aren't familiar with Algomah Acres, you really should be. It is run by beekeeper/meadbrewers Melissa Hronkin and John Hersman. It's also a re-purposed Catholic church, an art gallery (Melissa is an artist and the national award winning art teacher of several of your children), and a really lovely space for events--like the one tonight during which Chef Arlene taught the audience way more than I thought there was to know about honey tasting and cooked delicious chard :)

Find out more about Algomah Acres Here.


The honey tasting was fantastic. Chef Arlene walked us through the tasting of four different honeys. 

The first and third are wildflower honeys from Algomah Acres.
The second and fourth are varietal honeys. The light one is Tupelo
and the darker one is buckwheat.
Did you know there are nine different official aroma/flavor families of descriptives to use when evaluating honey? One of them is animal. Another is spoiled.

I thought the buckwheat honey had sweaty animal notes to it. In a totally
good way. Also a lot of warm toffee flavor.
It's also important to warm your honey before you taste it, to bring out the full flavor.

Melissa warming honey with her hot hands.
After the honey tasting, Chef Arlene presented us with some food pairings. My favorite was the goat cheese with wildflower (or maybe it was tupelo...I tried to take notes, but my fingers were so sticky). 

Then she made the greens. There was no set-in-stone recipe involved.

She simply sauteed some chopped garlic scapes (I suggest the spring onions from your share as a substitution) in a few teaspoons of olive oil. Then she added roughly chopped chard, with a bit of wash water still clinging to it, to the pan. She stirred until the chard was just wilted.


Then she stirred in a generous quantity of balsamic vinegar


and a dollop of honey. She used wildflower. This one I wrote down.


Then she sprinkled in a bit of sea salt and that was it. My tablemate, Alison, suggested adding pine nuts. I think that would bring the dish from really good to sensational. I'm glad I sat with Alison.


Monday, July 9, 2012

Week 4: The Vegetables are Here

A lovely foggy morning in the field.
Last week one of our members asked "So, is it pretty much just greens again this week? No vegetables yet?" He is a lovely man, and we're sure the question was posed with the purest of intentions. But, I still feel the need to mention that kale, lettuce, and arugula *are* vegetables. Yummy and nutritious vegetables at that.

But I'm guessing most CSA members know that :)

I am curious to know though whether any of you might have an idea as to what this is about:

Our chard, which is generally a no fuss crop, is suffering from something
unpleasant this year.
We wanted to include chard in the shares this week, but it all looks like the plant pictured above. We've never seen anything like this. Have you? Our theories include virus and heat damage, though I don't really think the heat would do this. Research led me to a virus that only strikes beets and chard growing in arid regions of the country (our weather hasn't been that strange this season, right?) and aphids. The damage seems to fit the description of aphid damage, but I haven't seen a single aphid out there...hmm. Always something to learn in this line of work.

Happily, there are several items that look great for the share this week. Greens and vegetables. This week  members can expect to receive: Lettuce, Bunching Onions, Spicy Salad Mix (Arugula and Mustard), Parsley or Sorrel, Baby Pac Choi, Radishes, Snow Peas, Root Vegetable Combo (turnips, carrots, and beets or kohlrabi), Cauliflower, and A Hoophouse Treat. 

Though the weather has tempered for now, the cauliflower, which prefers cooler weather, began heading when it was still very hot out and the heads do show signs of stress. They are smaller than we would like and have a bit of a purplish tinge to them. I recommend using them cooked rather than raw (they would work very well in the curry recipe below if that strikes your fancy) because some of them have an extra strong cabbage flavor due to stress. Cooking will help to reduce that.

Things are starting to trickle out of the hoophouse in small quantities, so there is a wide selection of potential hoophouse treats. Members will be able to choose between tomatoes, eggplant, purple sweet peppers, jalapenos, tomatillos, and ground cherries.


A smattering of potential hoophouse treats.

The items in the photo that look like tiny tomatillos are the ground cherries, also called cape gooseberries. Other than a few plants in a tiny vegetable garden my parents let me grow many years ago, this is the first time Scott or I has grown ground cherries, so we are still learning the ropes with them. My guess is they are new to most of you too. Ground cherries are members of the tomato family that are used as fruits, rather than vegetables. They taste like a cross between tomatillos (which they are very closely related to) and pineapples (which, I hope you already realized, they are not even slightly related to). They can be made into pies, jams, and dried to use like raisins. However, the most anyone will get this week is one pint of them, so my guess is all the ground cherries going out will be munched upon plain, or possibly sprinkled on top of a salad.

I have to admit it is a little difficult to tell if they are ripe. The idea is that the ripe ones fall off the plant, so I pick up the fruits on the ground - most of those are golden and delicious. Many fruits fall off the plants at the slightest touch - most of those are golden and delicious too. Some of the fruits in both of those categories are still a bit green though. I find these green fruits are still pretty good, they just taste a lot like tomatillos and nothing at all like pineapple.

Root Vegetable Curry

The medley of root vegetables you are receiving this week may seem more fit for the fall. We planted them early in the hoophouse where they enjoyed the "cold" spring weather (there were a few stretches of proper weather) and then appreciated the heat - as long as we made sure they had plenty of water. Though they are traditional soup and stew ingredients, soups and stews are not really fitting this time of year. I think this mild curry is just the thing. Serve it over rice.

  • 2 Tablespoons butter
  • 1 medium onion, diced, or the bunching onions from your share 
  • 2 cloves garlic, minced
  • 1 thumb sized piece of ginger, peeled and minced
  • 1 jalapeno (or more or less to taste) cut into thin rounds
  • 2 teaspoons curry powder
  • 1 to 1.5 pounds root vegetables (carrots, kohlrabi, turnips, and beets in whatever combination you choose), peeled as needed and diced into 3/4 inch cubes
  • 1 13.5 ounce can coconut milk
  • Water
  • 1 Tablespoon tomato paste

Melt the butter over medium/low heat in a medium saucepan.

Add the diced onion, garlic, ginger, jalapeno (if using), and curry powder. Stir well to coat with butter. Cook, stirring frequently, until the onion is soft and just beginning to turn translucent.

Add the root vegetables to the saucepan, stir well to coat with butter and seasonings.

Pour the coconut milk into the saucepan. Fill the coconut milk can about half full with water (which should be about 6 or 7 ounces of water). Stir the tablespoon of tomato paste into the water until it is evenly combined. Add the water and tomato paste to the saucepan and stir well.

Turn the heat up and bring the curry just to a boil, then turn the heat to low and simmer, covered, until the vegetables are tender, approximately 20 minutes.


Monday, July 11, 2011

Early Summer Soup with PEAS!

The fields have officially switched from spring to summer. The greens will be tapering off (they certainly won't be gone entirely - what's a CSA share without a few greens?), and the non-leafy vegetables will begin filling up the share bags. This week includes three new to 2011 non-leafy items for members to enjoy, along with lots of greens to keep things interesting.

The share includes: Head Lettuce, Salad Mix with arugula and mustard, Braising Mix, Chard, Green Onions, Snow Peas, Shelling Peas (probably, we might give the Saturday folks shell peas this week and the Tuesday/Wednesday folks shell peas next week), Cauliflower, Mint, and a Green Pepper from the hoophouse. A few of you may get a couple jalapenos, a handful of cherry tomatoes, or a Japanese eggplant if we run low on peppers.

New Ace Peppers in the Hoophouse. On July 11th.
In the Upper Peninsula. Astounding!
First, I gotta say it blows my mind that we have so many peppers ready in the same week that the peas are coming in. The peppers are coming from the plants we planted in the hoophouse on our member work day way back on May 1st. We were actually a little worried about the peppers a few weeks ago because they were kind of slow to take off, but now that they have, they are going strong. A few varieties seem to be exploding with peppers. Season extension is an amazing thing.

An Oregon Giant Snow Pea. These things really do get giant,
but they remain sweet and tender, even when they're huge! 
Second, I have to say Hooray For Peas!!! The peas went in the ground around mid May. If you remember, the spring was cold and wet this year and we had to wait a little longer than we wanted to get our seeds in the ground. Well, the peas didn't mind getting in late. They have grown like gangbusters and they're starting to come on around the same time they have in years past.

As mentioned earlier, all members will receive snow peas this week (and hopefully for the next couple of weeks) but we are not quite sure about the shelling peas. If they plump out enough by tomorrow everyone will get them this week, otherwise the Tuesday/Wednesday members will get them next week. The window of perfection is slim for those little guys and we want to make sure that no one gets teeny or mega giant shelling peas.


Cauliflower and Chard, glowing in the afternoon sun. 
My guess is that no one will have trouble figuring out how to use the new items in the share this week. I wouldn't be too surprised if many of you find your snow peas are all eaten up before you even make it home from pick up.

The only new thing that some of you may not be very familiar with is the chard, which has shown up already in its baby form in the braising mix. Chard is the same plant as the beet, bred for large greens rather than a plump root. When it is tender it can be sliced up and added to salad, but it is generally eaten cooked. Try using it similarly to the braising mix or kale you have received or, if you haven't eaten all of your snow peas yet, make a pasta salad. Slice snow peas, green onions, and chard in bite sized pieces (include the chard stems, sliced into quarter inch pieces). Marinate the vegetables in a dressing made with white wine vinegar, olive oil, honey, salt, pepper, and fresh herbs (thyme, mint, or basil would be good) for about a half an hour. While things are marinating, prepare a box of farfalle, rotini, or macaroni according to the directions on the box. Cool the pasta and toss it with the marinated vegetables.

If you would rather cook your chard, and feel like spending a bit more time in the kitchen, try the following soup recipe.

Early Summer Soup

This is a very light and delicate soup with no cream, or even stock to distract you from the fresh flavors of the vegetables. Paired with toasted ham and cheese sandwiches, it made a perfect dinner for the three of us (with a little soup left over) on this oppressively hot evening.
  • 6 cups water
  • 3 cups (or more) shelling peas, measured in the shell
  • 1 small bunch green onions (8-10 onions)
  • 4 chard leaves
  • 10 peppercorns
  • 1/4 teaspoon salt
  • 1 small head cauliflower
  • 1 tablespoon finely chopped mint
  1. First make a vegetable stock by simmering the following ingredients in a covered pan for about 30 minutes: water, the shells from the peas (but not the peas themselves - reserve the peas), the chopped green portions of the green onions, the chopped chard stems (but not the leaves), the pepper, and the salt.
  2. While the stock is simmering, separate the cauliflower into very small florets, slice the white portions of the green onions thinly, and slice the chard leaves into very thin strips. 
  3. When the stock has finished simmering, strain the liquid, and return it to the pan.
  4. Add the cauliflower and onions to the stock and simmer until the cauliflower is just tender, about fifteen minutes.
  5. Add the peas and chard leaves to the soup, stir for one minute.
  6. Remove from the heat, stir in the chopped mint.
  7. Taste for salt and pepper before serving.

Thursday, June 23, 2011

A Who's Who of CSA Greens

The following photo list of greens is a work in progress. I will start with the spring/early summer greens (makes sense, seeing as it is early summer) and add later season greens as they come ready for harvest.

I hope the pictures are attractive, but I've tried to resist the urge to select only the most perfect samples of each green to photograph. That's because the greens we harvest are never entirely perfect. They grew in a field outside, exposed to sun, rain, wind, and insects. They lived good lives and it shows.

I'm going to keep the list alphabetical, rather than seasonal because some greens span the entire growing season.

Hopefully this will help members answer questions such as: "Which one's mizuna again?" and "What was that weird spicy lettuce in my share last week?"

Arugula
Arugula harvest starts in the spring, takes a break in the hot summer (assuming the summer actually gets hot) and resumes in the fall. The flavor of arugula is the most complex of all the greens we grow. It tastes, sweet, spicy, nutty, bitter, and musky (for lack of a better term) all at once. Arugula tastes slightly different with each cutting. We never know which flavor will shine the brightest, but it always tastes distinctively arugula-y. It is a wonderful salad green, though some people find its raw flavor an acquired taste. If you aren't into it raw, try it cooked (arugula quiche is very good) or tuck a few leaves into a sandwich and sort
of ease into it.

Beet Thinnings
These greens are the tops of immature beets. Beet seeds are unusual because each seed is actually a cluster of fruits that produces more than one plant. This means that no matter how thinly you plant your beets you are going to have to thin out some seedlings if you want the roots to be able to mature. The results of thinning all of those beets is a brimming bucket of tender beet greens. They are yummy as both a salad or cooked green, with the same earthy, slightly salty, flavor as chard (which is the same species as the beet). We like to include them in our braising mix.

Braising Mix
This blend of cooking greens varies depending on what is available at harvest time, and its flavor will vary accordingly. Recognize it as braising mix, rather than a salad blend, by the large, relatively tough, strong flavored leaves it contains. It might include any or all of the following greens: kale, chard, beet greens, mizuna, mustard, arugula, dandelion, purple orach, senposai, turnip greens, and probably some others I haven't thought of. It can be used in any recipe calling for cooked greens. If you are not sure what to do with it, try this: Heat 1 Tbs olive oil in a large frying pan with a generous pinch of salt and some fresh ground pepper, chop your greens roughly, stir the greens into the olive oil until they wilt, add half a cup water and 1 tsp balsamic vinegar, cover and simmer for about twenty minutes. Do that, and your greens are braised. You can eat it as is, cook it in a quiche, serve it over rice, or mound it on top of a grilled t-bone.

Chard
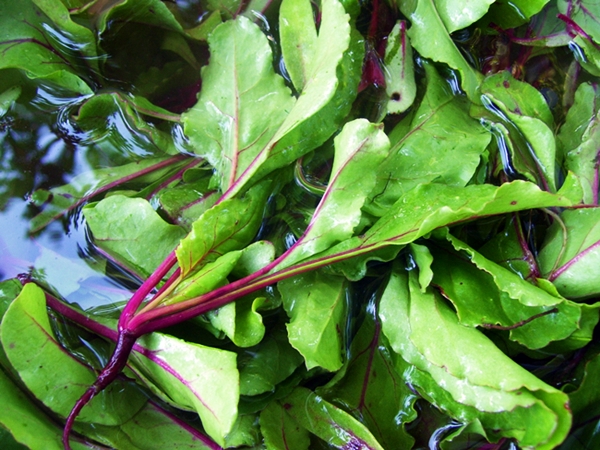
We grow rainbow chard. When full sized the leaves are large like kale. The baby leaf in the picture is from a batch of braising mix. Recognize chard by the shiny leaf, brightly colored stems, and earthy beet like flavor. Chard is actually the same plant as the beet, just bred for leaf rather than root growth. It is best cooked. It can be braised, sauteed, seared, or cooked however you see fit. In the fall we love to add strips of chard to creamy squash soup right at the end of cooking. Also, please don't discard your stems! Many recipes call for discarding the stems of chard but we find that chopping them up small and cooking them for a few minutes before adding the leaves adds color, crunch, and all around goodness to the finished dish.

Dandelion
This intensely bitter green looks exactly like the dandelion leaves that are growing in your yard, except that it has a dark red mid-rib. That being said, cultivated dandelion greens are not actually dandelion at all. This dandelion is a chicory. The one we grow is called Italiko Rosso Chicory, which I have to admit does sound much more gourmet than dandelion. This year we grew only a small patch of dandelion, for adding to our braising mix. We like its bitter bite and tender texture. For now, cook it up with the rest of the braising mix. Next year we might grow enough to include it as a salad green as well.

Kale
Sorry, I couldn't resist a bit of fanciness with the kale photo. One of the most striking things about kale is the silver cast it takes on under water. That's what you see in this picture. Kale harvest starts early and continues through the entire CSA season, though we don't necessarily harvest it every week. We grow a few different varieties of kale, some with purple stems, some with ruffled leaf margins. Though it might look different from week to week, kale is always recognizable as a large dark grey green relatively tough leaf. The flavor is of a slightly sweet and spicy (clove spice, not jalapeno spice) cabbage. It is best cooked, we like to chop it up and toss it into all sorts of dishes (spaghetti sauce, scrambled eggs, soup...) towards the end of cooking.

Head Lettuce
Lettuce prefers cool weather so it is generally an early and late season green. We are experimenting with several different varieties of head lettuce this year, along with our favorite leaf lettuces, to try to provide members with as many weeks of lettuce as possible. The one in this photo is called Tom Thumb, because of its small size. I imagine most of you will have no trouble recognizing the lettuce in your share, just keep in mind that it might look a little different from week to week.

Leaf Lettuce
This combination of two varieties of leaf lettuce (tango - the green, and merlot - the red) is our go to lettuce. It grows well for us, isn't unpredictable like head lettuce can be, stands up to all but the driest heat, and the deer don't covet it the way they do the head lettuce. You will see it more than once throughout the CSA season. Happy salad!

Mizuna
Mizuna grows quickly and holds well in the field all season long. When we cut it, it grows back for us. It is a mild green that is equally good cooked or raw. All of these things mean it is a CSA staple. Growers love it, but members have trouble remembering what it is called and figuring out what to do the it. If you are at a loss here is my suggestion: Chop the mizuna up small (half inch or so), boil some pasta in well salted water, heat a generous portion of good olive oil in a frying pan, add some minced garlic to the olive oil and stir till it's golden, coat the pasta with the garlic/oil then stir in the mizuna. Now that you have enjoyed your first mizuna meal, experiment from there. Remember, it's the spiky green.

Mustard
Many of the greens we grow are mustards of one sort or another, but this one is the standard. Mustard grows quickly in the early season, then keeps on growing quickly until it flowers and its leaves become inedibly tough. We include it in our shares as long as it is tasty. Sweet, spicy (this time I mean like jalapenos) and delicate, mustard is good in salad and delicious cooked but it does cook down a lot. It is heavenly atop a grilled burger.

Purple Orach
It feels a little silly to call this intensely purple leaf a green, but I guess it would be even worse to call it a purple. Its flavor is slightly astringent, like strong spinach. It is, in fact, a relative of spinach that's often grown as a late season spinach "replacement" by gardeners who wish it was spinach season all year long (don't we all...). We're experimenting with orach this year, and only have a small trial patch so expect to see it in mixes such as the braising mix. It's tender enough to use as a salad green but, so far, we like its flavor best cooked. Please let us know how you like it. 

Baby Pac Choi
Pac choi (or bok choy) is probably the most familiar of the Asian greens we grow. We favor a baby variety called shuko, which is quite a bit smaller than most varieties of pac choi. It makes a delicious stir fry and is tender enough to enjoy raw. If you're not sure which one is the pac choi, look for paddle shaped leaves that are mostly fleshy stems. If its new to you, remember, this green is really all about the stems so don't discard any part of it.

Radicchio
Radicchio is impressively bitter. Its bitterness by far out bites the other bitter greens we grow. You may, then, wonder I would suggest that you add it to a salad. It's a matter of balance. A big bowl of plain radicchio is not all that appetizing, even to those of us who appreciate bitter. A simple salad of radicchio with a pinch of sea salt, a drizzling of good balsamic vinegar, and maybe some freshly grated pepper and Parmesan cheese is, on the other hand, appetizing to pretty much everyone who eats salad. It goes well in any salad that includes powerful flavors, such as blue cheese, berries, or sorrel. Radicchio is also often braised (see the braising mix above for the technique). Braised radicchio combined with garlic and Parmesan cheese is wonderful served over pasta.

Senposai
Senposai is also an Asian mustard green. The varieties are truly endless. This one is mild and sturdy, but still tender. To me it is a cross between kale and pac choi. The leaves are large and look somewhat like kale, but they are tender like pac choi and don't have kale's strong cabbage flavor. This is the first year we have grown this particular green and so far we have included it in the braising mix - it is fantastic cooked - but it will likely show up as a bunched green as well later in the season. Use it in a stir fry or a salad. It will serve you well cooked or raw.

Sorrel
This is probably the most uncommon green we grow, which is surprising because it is by far the easiest. We planted a patch years ago and have been harvesting it ever since. It starts growing in the spring, almost as soon as the snow melts, and, as long as we keep picking it, produces all summer long. Sorrel is bright green, sometimes with a touch of hot pink, and brightly flavored. It is tart. Kids tend to gobble it up raw but I prefer to temper its flavor by cooking it. Sauteed in a bit of olive oil, it sort of melts into a thick sauce which is the world's most perfect omelet filling, especially when paired with goat cheese.

Spinach
Spinach, like lettuce, probably needs no explanation. It is an early green that simply does not grow well once summer has gotten underway. We celebrate its brief appearance in the beginning of the season with a much appreciated salad, then await its return the following year.


Thursday, October 28, 2010

Eat Your Greens

A while back my friend Meghann posted this as her facebook status:

"Someday, I'm sure my children will be shocked to find out not every Mom put Kale in everything."

It made me giggle because, as a CSA farmer, the question I most frequently receive from members is "What do I do with all of this kale?" or chard, mizuna, arugula, escarole, sorrel, or whichever green things are being tucked into the shares that particular week. I have a hard time not responding with this simple statement: Eat it.

Chard growing in the morning light.
CSA fields tend to be a bit messier than home gardens,
but we still manage to grow the good stuff!

That isn't meant to be flippant. It's just that, well, that's what I do with it. In my house we munch on raw greens just because they're there, make them into salads, and add them to at least half of the dinners we cook. In fact, my family and I like greens so much that I get kind of sad when winter comes and the greens stop growing. So, not only do I eat my greens, I dry kale and chard so that I can eat even more of them later.

I know that the kale chip, oiled and seasoned kale dried for snacking, is pretty hot right now, and those are good, but I am talking about simply drying greens so that they can be added to dishes during the off season.

It is an easy process, and now is the time of year to do it. 


 I use an electric dehydrator, though you could just as easily use your stove or a solar dehydrator. We use what we have - even if it isn't the most efficient option. A solar dehydrator is certainly on our wish list...

Cut or tear the greens into small pieces and lay them out on the dehydrator tray. Space them evenly, so that they are not touching.


Dry them overnight on the lowest setting. When they are done they will look pretty much they same as they did when you started, just a little duller and more velvety, and they will be crisp.

Well dried Kale.

Crisp Rainbow Chard.


Pack the dried greens into jars, close the jars tightly, and the greens will keep all winter long.

Dried kale, ready for a season of storage.
Now that you have dried your greens, you may be left with that lingering question. "What do I do with all of this (dried) kale?" Once again, my answer is simple: Eat it.

The recipe below is almost as easy as the drying itself. It makes a hearty breakfast, a satisfying lunch, or a comforting low key dinner. It really just depends on how you look at things. You can also throw a handful of the dried greens into many of your standard dishes. I suggest starting with spaghetti sauce. Once you see how tasty that is, go from there. Be extremely creative.

This can also be made with one or two leaves of fresh kale or chard cut into bite sized pieces.

Oatmeal with Dried Greens, Chicken Stock, and Root Vegetables

  • One cup steel cut oats 
  • One cup thinly cut root vegetables - I used carrots for this version because our neighbor had dropped a bunch off for us (look how huge!). Celeriac and parsnips are also divine here.
  • 1/2 cup crumbled dried kale or chard, plus more for serving
  • 2 1/2 cups chicken stock -  Vegetable stock or water works too if you want to go vegetarian.
  • Salt and pepper to taste


  1. Bring the stock or water to a boil in a small saucepan.
  2. Stir in all of the other ingredients.
  3. Turn the heat down to simmer, cover the pot, and simmer, stirring occasionally, until the oatmeal is fully cooked. Cooking time will vary depending on the oats and your personal texture preferences. 
  4. Add salt and pepper to taste.
  5. Spoon the oatmeal into serving bowls and top with additional crumbled dried greens.

It may not be that photogenic, but it is highly tasty and oh so comforting.